Cleaning Up a Transfer from an Actor to a Character Tutorial |
||||||
By Jimmy Almeida and Kevin Wang Introduction This tutorial covers the process of fixing minor problems that may
arise when transferring data from an Actor to a Character. It also
covers the process for getting the BVH skeleton data ready to take
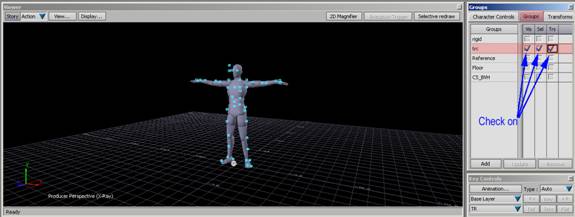
into Character Studio. 1. Bring in your “Name”_ROM.fbx file that has your c3d data mapped to an Actor and that has your Characterized Character and CS_BVH in to the scene by choosing Open. 2. Make sure that your .c3d or your .trc data is visible, selectable and transformable using your Groups Pane.
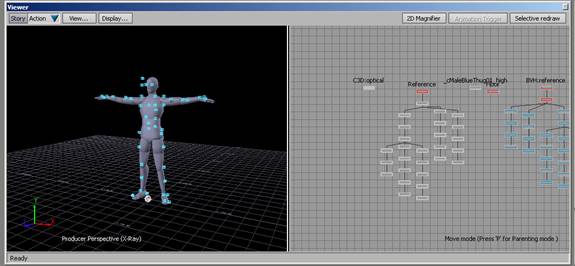
3. Split your screen into 2 screens using Ctrl+2. Make one of them a Schematic View by pressing Ctrl+w.
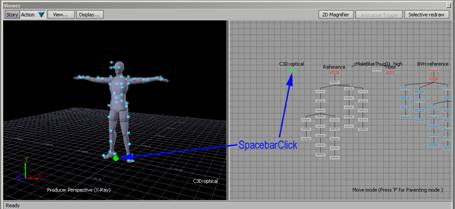
4. Spacebar Click (SBC) the C3D: Optical node in the Schematic View. This tells Motion Builder that you want to do something to this node. In this case, we will be adding Motion data on top of it so that the Marker set that you have set up will drive all the other takes as well. NOTE: If you did two ROM files for the days takes, you need to know which takes belong to which ROM file.
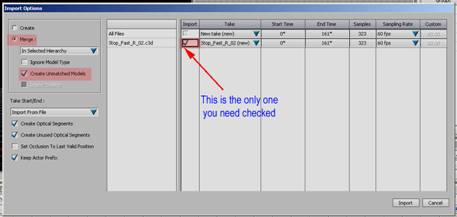
5. Go to File>Import and bring in just the animation data that you want. Your Actor is not taking on the animation of the file you just brought in.
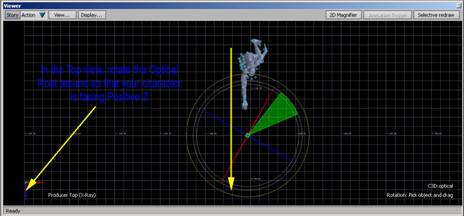
6. With the Optical node still selected, press R for Rotate Ctrl+1 to go back to 1 view and then Ctrl+T for the Top view. Play your animation and rotate the optical root node around so that the character FACING positive Z. NOTE: Sometimes your character moves side to side or backwards. In any case, make sure that it is facing (Has the head turned towards Positive Z.
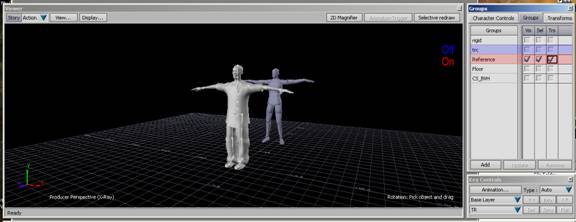
7. Go back into Perspective view (Ctrl+E). You can now turn off your c3d data in the Group Pane and turn on your Reference.
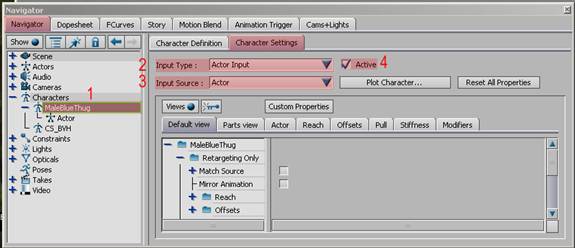
8. In your Navigator under Characters, Double click on your Reference Character (The character that has a mesh skinned and weighted to it). For the Input type, choose, Actor. For the Input Source, choose Actor. Then Click “Active”. You Character pops to the Actor and is now being driven by your Actor.
9. The next thing that you want to do is get the Character to match up with the actor as best a possible. In this case I want to start with pressing Match source. This will make sure that the Character is right on top of the Actor. As far as everything else goes I really only want to “Massage” the chest reach. In addition to that, I can see that my arms don’t line up properly. This tells me that I am going to have to do some tweaking on the arms. In that case, I want to turns of any thing that is on the arms such as the Pull and maybe the Stiffness. This needs to be played around with though I would recommend not getting too crazy with the adjustments. 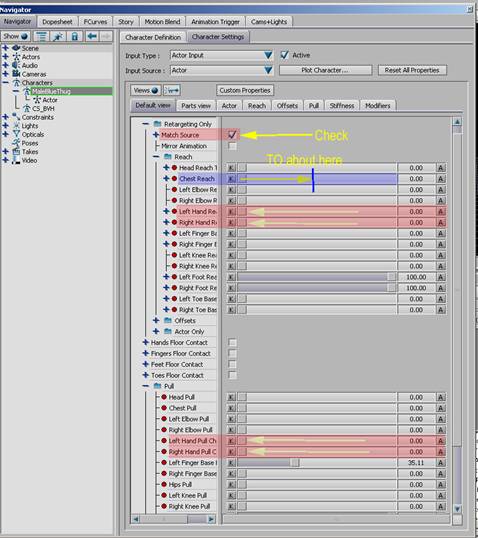
|
||||||
Back |
||||||
 |
||||||