Cleaning Up a Transfer from an Actor to a Character Tutorial |
||||||
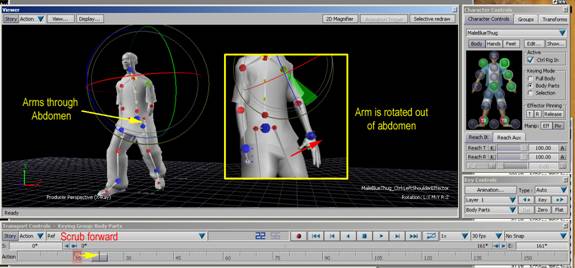
By Jimmy Almeida and Kevin Wang Part 3 19. Then move to the place where the animation is bad on one of the arms and find the passing point (change in direction). This is where you will adjust your animation and set a Flat Key. Do this for the rest of the animation.
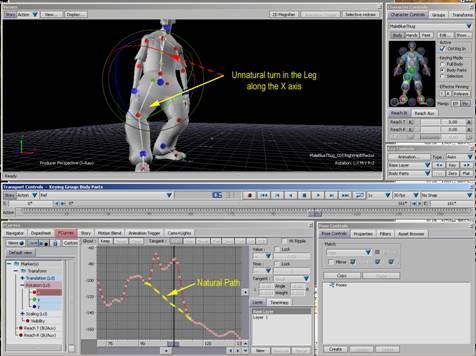
20. If there is a jitter due to the layered keys you just set, you can attempt to clean it by using the Fcurve editor (Function Curve Editor). In this example, the knee is flared out against the natural motion of a leg. To fix this, I go into my Base layer in the Key Controls. Then I open my Fcurve Editor. Inside the fcurve editor, I want the rotation since the leg is rotating about on a ball joint. More specifically, I see that it is the X Rotation I need to fix. As I zoom in on the problem frames, I see how there is a skew in the flow of the curve that can be corrected.
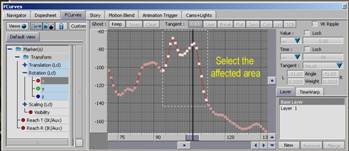
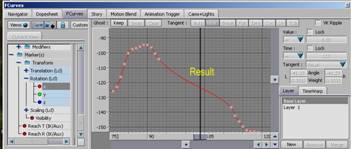
21. SB+Drag around the bad keys and then press delete. You may want to adjust the control handles to straighten the curve afterwards.
22. Once everything is perfect, create a new fall back in the Takes drop down by duplicating the reference fall back and call it Plot. This will help preserve your animation so that, when you delete the control rig in the next step, you can always come back.
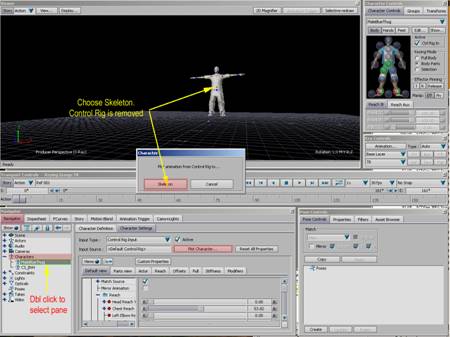
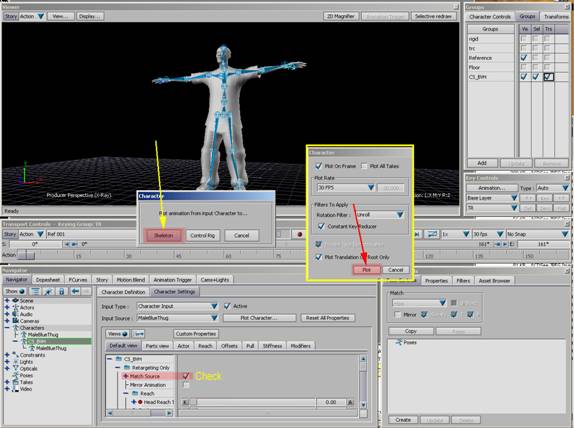
23. Go into the Characters drop down in the Navigator and double click on your Character. In the Character Settings tab, click on the Plot Character button. This time you will be plotting all your move data to the skeleton, which will then no longer be driven by the control rig. Choose Skeleton from the pop up box and then click Plot on the next pop up. The Control rig is removed since it is no longer needed.
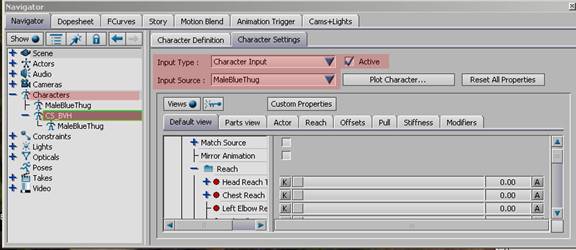
24. In the Groups Tab, turn on the CS_BVH. This is the skeleton that will drive your final data. In the Characters drop down, dbl click on CS_BVH. Select Character Input for the Input Type and your character’s name for the Input Source. Then click on Active.
25. In the Settings below, Make sure that match source is checked and that everything else default. When that is done, click Plot Character and choose Skeleton and then Plot for the next PopUp.
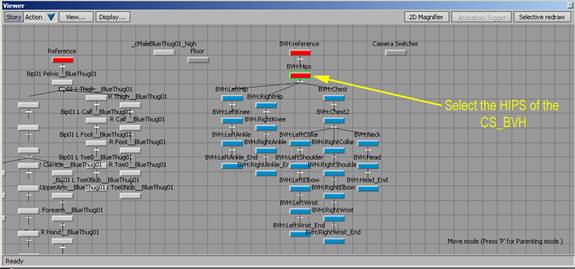
26. The Animation Data from your character is now on the CS_BVH Skeleton. You can now export it to Character Studio. 27. Go into the Schematic View and select the HIPS node of the CS_BVH (should be the first nod UNDER the Reference node).
28. Then go the File>Export and export it as a .bvh file. In the Popup box, choose only the Plot take as it is that one that has the info that you want.
You’re Finished!
|
||||||
Next |
||||||
 |
||||||