Understanding Motion Builder’s IK/FK Control Rig Tutorial |
||||||
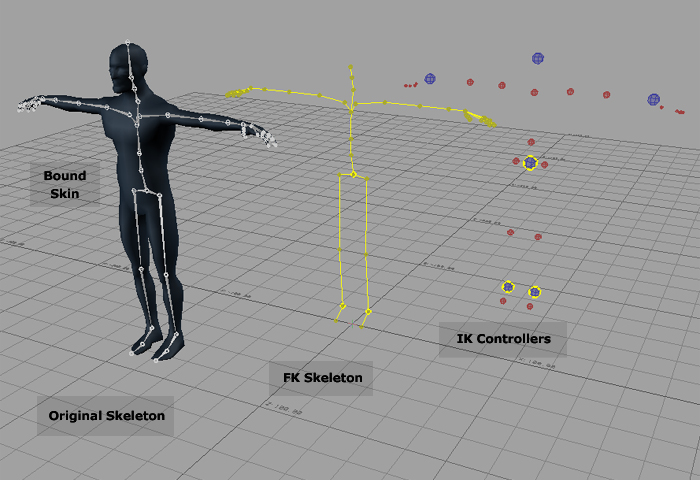
By Ricardo Tobon Introduction This tutorial will cover the basics of using the Motion Builder IK/FK Control Rig. In film and videogame production rigs are turned over to animators with documentation that explains how they work. Motion Builder’s Control Rig is one of the industry’s (out of the box) most versatile setups; unfortunately there is very little documentation out there on it. You can consider this tutorial the Control Rig’s lost documentation. For more in depth information on this subject check out Chad Moore’s and Brad Clark’s dvd “The Animators Tool Kit”. To follow along and try out the concepts from this tutorial please download the MocapGuy.fbx file. Motion Builder’s Control Rig and its Switches The Control Rig is an IK/FK rig. This means that it is composed out of two sets of controllers that are driving a skeletal hierarchy. There is the skeleton that you created and bound your geometry to, a Forwards Kinematics skeleton and the Inverse Kinematics set of controllers (fig 1).
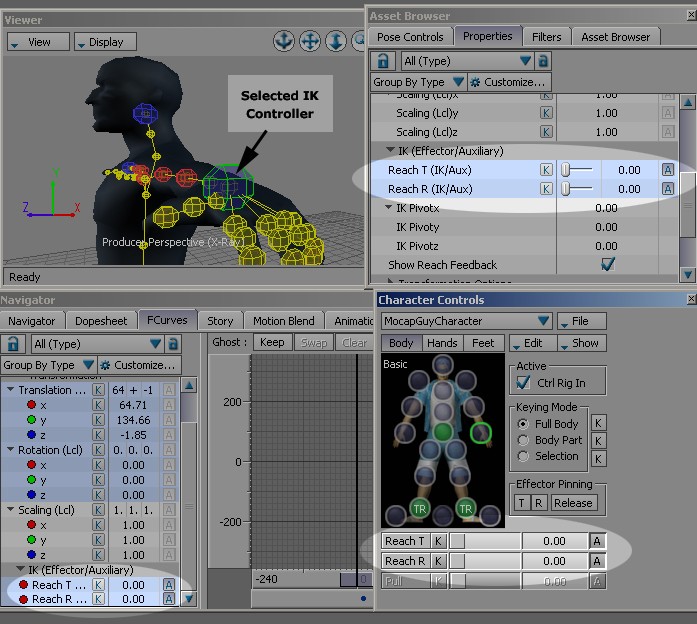
Like most IK/FK setups on the planet there are switches in the Control Rig that allow you to decide which one of rig elements (IK or FK) is going to be driving your bound skeleton. The Reach Translation and Reach Rotation are the attributes that switch between controllers (IK and FK) for any selected element. For example Figure 2 shows that you can find the Reach T and Reach R attributes for the Left Wrist Effectors in the Character Controls window (we will cover this window later in the tutorial), the Properties window and the FCurves tab (fig 2). In order to keep things simplified we will be accessing the Reach attributes mainly from the Character Control window.
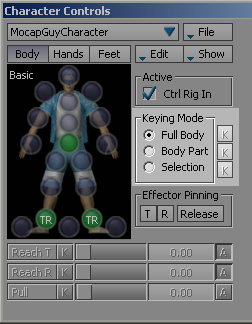
When the Reach T and Reach R of an Effector are at 100 it means the section is being controlled by Inverse Kinematics. If the Reach values are at 0 the section is being controlled by Forward Kinematics. Keyframing Modes There three are keying modes in motion builder which are Full Body, Body Part and Selection. Depending on which-one you have selected you might be keying both set of controllers, a section of the controllers or one single element (fig 3).
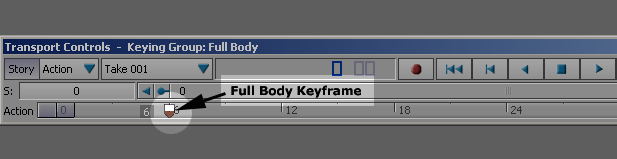
When Full Body mode is selected you are keying every single element in the entire Control Rig (both IK and FK). The keys from Full Body mode display red in the Action Timeline (fig 4).
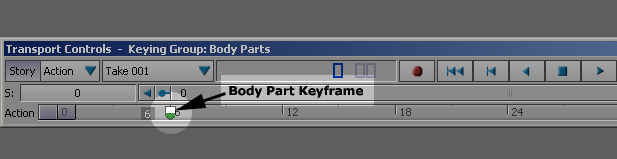
When Body Part is selected a section of controllers gets keyed on the FK level as well as the IK level. Keys from Body Part display green in the Action Timeline (fig 5).
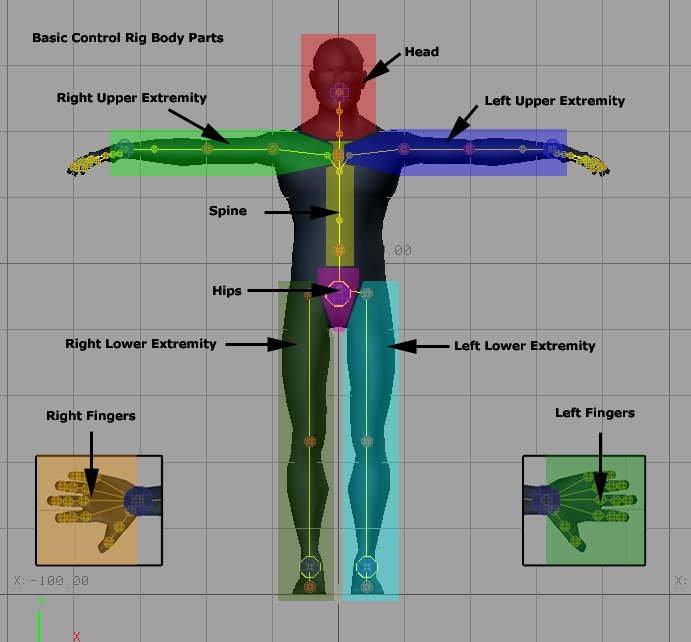
There are seven sections of the basic Control Rig in Body Part mode. These are Hips, Spine, Head, Left Lower Extremity, Right Lower Extremity, Left Upper Extremity, Right Upper Extremity, Left fingers and Right Fingers (fig 6).
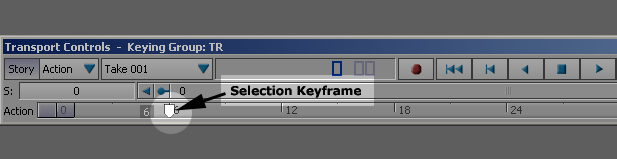
The last keying mode is Selection. When using it any key that you set affects only the element selected and nothing else. Keys set on Selection mode display transparent on the Action Timeline (fig 7).
|
||||||
Back |
||||||
 |
||||||