Working With Range of Motion (ROM) Files Tutorial |
||||||
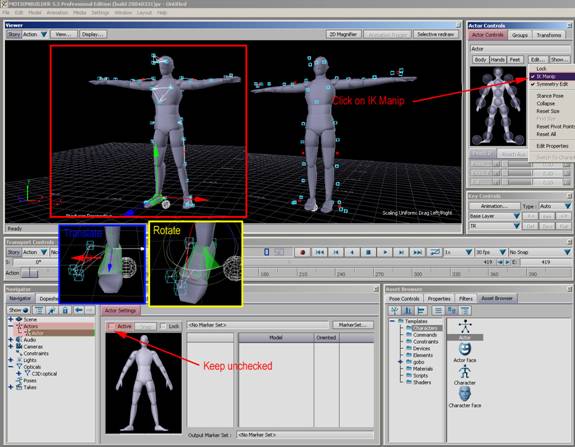
By Jimmy Almeida and Kevin Wang Part 2 10. In the Right View (Ctrl+R), grab the Optical data root and align it better to the actor. When you are done, go back to the Perspective View (Ctrl+E) 11. Under the Actor Controls, in Edit, click on the IK Manip (make sure that “active“ in the Actor Settings is turned off. This will turn the feet and hands into IK handles. Align the actor’s feet and hands to a place that best dictates the optical data. Hyper extension in the arms and legs can be bad.
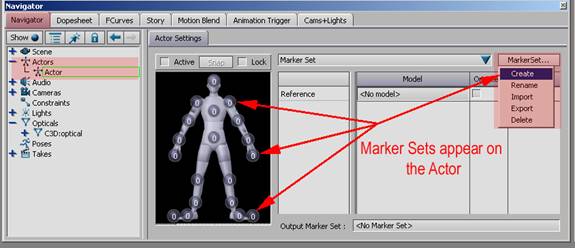
12. In the Actor Settings Pane, click on Marker Set>Create.
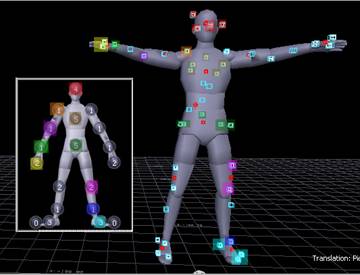
13. Assign Specific markers to the Actor Layout (Actor Diagram). Follow the diagram below. The used markers are depicted by white markers called Marker Sets. Select your first Marker by SBC the marker. Then for each subsequent marker that you want to add to the selection, SBRC. When you have all the markers that you want to add to the Marker Set (5 max) Alt+drag them to the appropriate set on the Actor Diagram.
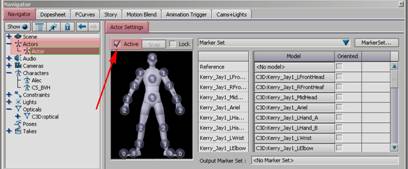
14. Once that is done, click on the “Active” box.
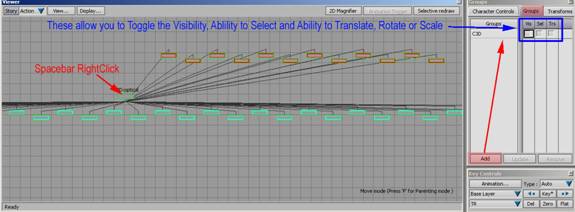
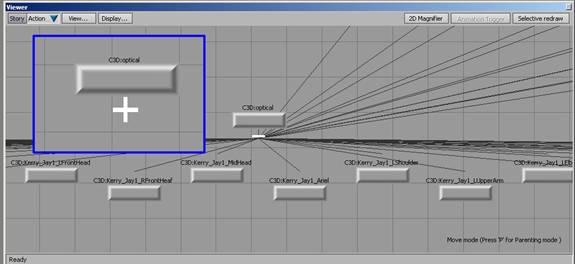
15. Scrub the ROM file for anomalies. There should be no jitters or popping and the feet and or hands should be firmly on the ground without dipping. If there is a problem, the file needs to go back to VICON (or whatever you captured it in) for further cleaning. Notate the frames that have problems so that it is easy for the cleaner to find. 16. Go into your Schematic view by pressing Ctrl+W in the Perspective View. Navigate like you would in the side or front view. Find the C3D data. SBRC on the root node to select everything in the hierarchy. Under the Groups Tab, Click the Add button. Having your assets in groups is a quick and easy way to hide them and keep them from being altered.
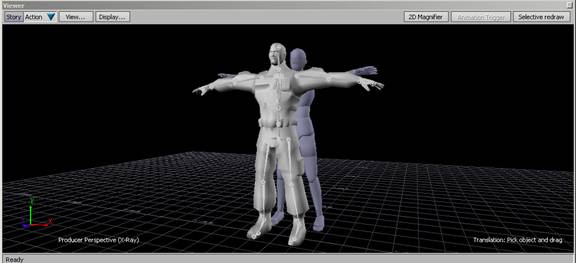
17. Once everything is perfect, save out the final file as *_ROM.fbx. 18. Open the clean skinned character model and skeleton in its T pose and “Append” it into the scene. (see: How to prepare a Character Studio Character).
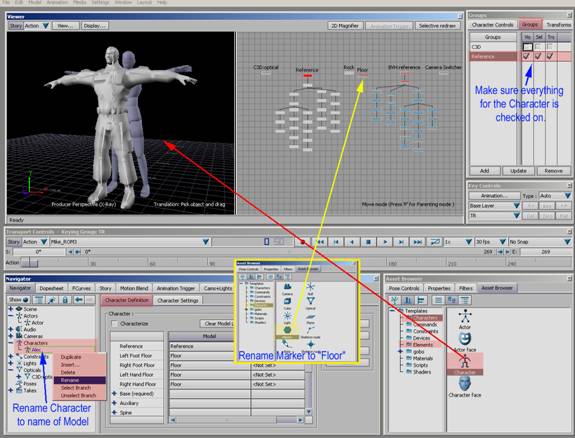
19. In the Asset Browser under Character, click a ”character” and drag it into the scene. In the Navigator, find the character line in the hierarchy and expand it. Another line named Character exists. Right click on it and pick rename. Call it the name of the model that you brought in. At the same time, go back into the Asset Browser and under Elements, drag in a marker into the “Schematic View”. In the Transforms Pane, change the scale to 10,.1,10. Rename it to “Floor”.
|
||||||
 |
||||||