Understanding Layered Animation Tutorial |
||||||
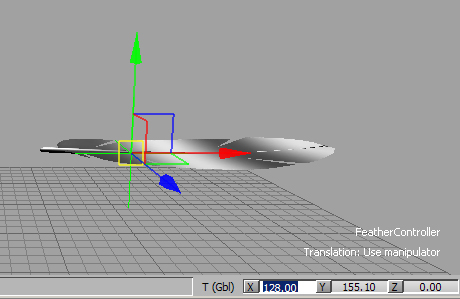
Page 2 Back and Forth With the Feather Controller still selected, under the Key Controls window select Multi Layer from Layers Options under the Animation dropdown (fig 5).
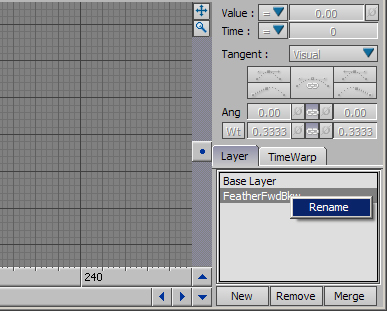
Change the current layer by selecting Layer 1 from the layer flap inside the FCurves tab. Right click on it to rename the layer FeatherFwdBkw (fig 6).
Notice how there are no key frames on this new layer.
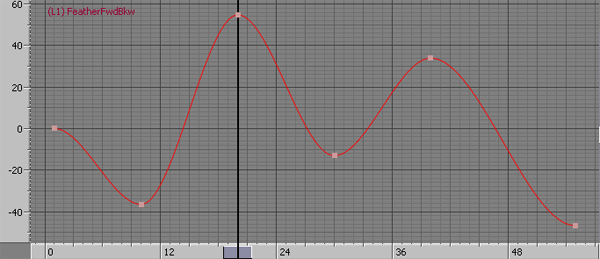
Key the Feather Controller on frame 20 at position 141, on frame 30 at -12, on frame 40 at -51 and on frame 55 at -217. The translate X curve should look like this (Fig 8).
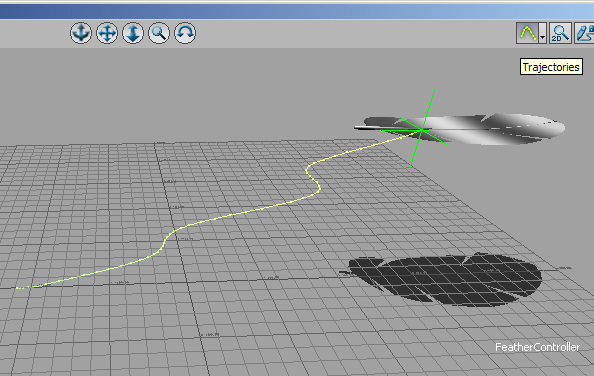
Turn on the trajectories button in the top right side of the Viewer window, the new path for the feather shows up as a yellow curve (Fig 9).
Feather Yaw Create a new layer by pressing the New button on the Layer section of the FCurves tab. Rename the new layer FeatherYaw. Layers can also be created and managed through the Key Controls window (fig 10).
Block the main parts of the animation by hitting the K key on frames
1, 10, 20, 30, 40, 50 and 55.
|
||||||
 |
||||||